

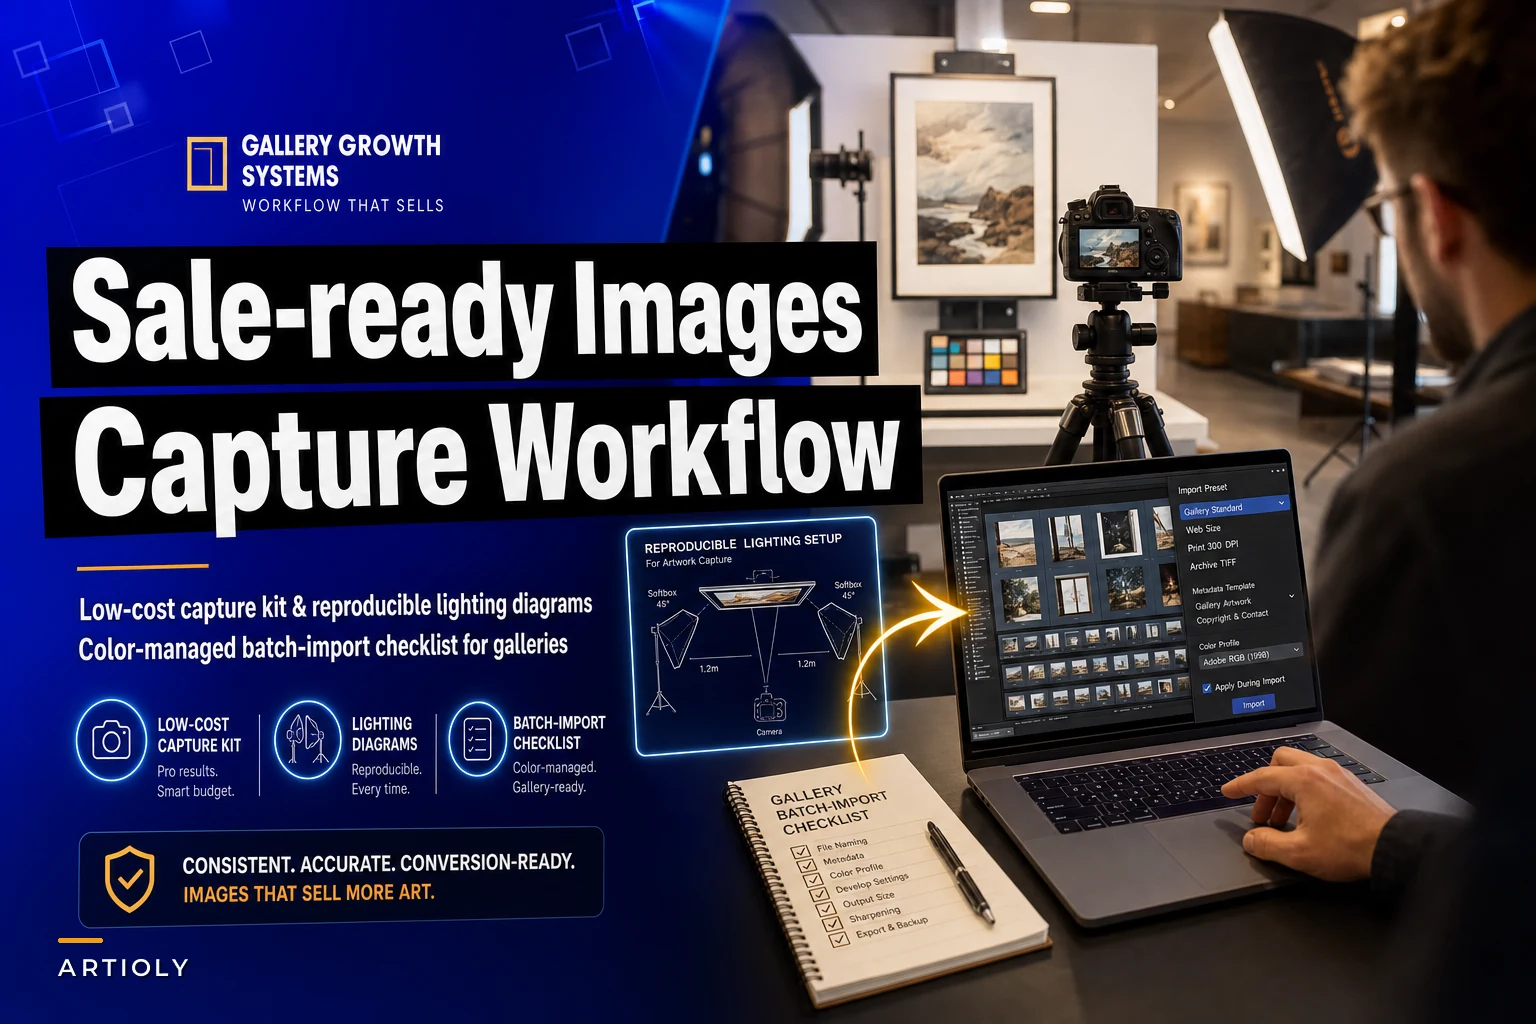

Most galleries spend $300–500 per artwork on professional photography. Twenty pieces for an upcoming show? That's $8,000 gone before you've sold a single thing. The alternative — shooting everything yourself with whatever camera's lying around — produces inconsistent results that make your catalogue look like a yard sale listing.
We learned this the hard way. Three different photographers over two years, each with their own approach to documenting work. The result was a catalogue that looked like three separate galleries stitched together. Paintings shot under warm tungsten, sculptures with harsh shadows, prints that looked washed out next to everything else. Collectors would ask for "better photos" before even considering a purchase. Some pieces sat unsold for months — not because the work was weak, but because the documentation made it look that way.
Then one of our artists, a painter who'd been shooting her own work for years, showed me her setup. Total cost: around $800. Her documentation looked more professional than anything a $15,000 annual photography budget had produced. Consistent lighting across every piece. Accurate colors. Files organized so well she could pull up anything from the last five years in seconds.
That conversation changed how we approach artwork photography workflow entirely.
Why galleries fail at photography (hint: it's not the camera)
The camera isn't the problem. Galleries with $4,000 DSLRs produce unusable images while artists with entry-level Canons create documentation that belongs in museum archives. The difference is process and consistency, not gear.
Walk into most small galleries and you'll find the same chaos. Someone shoots a painting against the gallery wall under track lighting. The following week, they photograph a sculpture on the loading dock because "the natural light looked good." Files get dumped onto a hard drive with names like IMG_4827.jpg. Color profiles? Never heard of them. White balance? Whatever the camera decides.
The expensive photographer you hired last year delivered beautiful images — but they shot everything their way, with their lighting preferences and post-processing choices. Now you have new inventory and either pay them again or accept that the new photos won't match anything already in your catalogue.
That inconsistency kills sales. When collectors browse your work, uneven photography creates friction. They can't properly compare pieces. Colors read differently. Scale feels off. The work looks amateur even when it isn't.
Building your capture kit for under $900
Forget the gear obsession. You need five things, and most galleries already own two of them.
Never miss a key exhibition detail again.
Artioly helps you organize, promote, and manage every exhibition effortlessly.
- Unified exhibition scheduling
- Artist and visitor notifications
- Inventory and sales tracking
No credit card required
The camera body — Any DSLR or mirrorless from the last eight years works fine. Canon T7i, Nikon D5600, Sony a6000 — all produce files that exceed what you need for web and print. Used bodies run $400–500. Already have one? Skip this cost entirely.
One lens — A 50mm f/1.8 costs around $150 new, less used. This focal length minimizes distortion for flat artwork. Some galleries obsess over macro lenses for texture shots. Unless you're selling based on brushstroke details, skip it.
Two continuous LED panels — This is where people go wrong. Forget strobes, forget complicated flash setups. Two basic LED panels with stands run about $180 total. Neewer makes panels that work well enough. Continuous light means you see exactly what you're capturing — no guessing, no test shots, no flash sync headaches.
A color checker card — The X-Rite ColorChecker Passport costs $90. This square of color patches becomes your calibration reference. Shoot it once per session, use it to correct colors in post, and suddenly every artwork matches reality. The number of galleries that skip this $90 tool while wondering why their reds look orange online is genuinely staggering.
A decent tripod — Not the $30 big-box store special. A proper tripod runs $80–120. Manfrotto's basic aluminum models hold up well. This isn't gear snobbery — it's about photographing fifty pieces without your camera slowly drooping toward the floor.
If your lights run hot, shoot the color checker at the start and again mid-session so you can detect any color shift.
Total cost if you're buying everything: $800–900. Under $500 if you already have a camera.
The only three lighting setups you actually need
Three configurations handle roughly 95% of what you'll shoot. Master these and stop reinventing the wheel every session.
Setup 1: The 45-degree standard (for paintings, prints, flat work)
Position each LED panel at a 45-degree angle to the artwork, roughly 6 feet away. Both lights at equal height, same intensity. The artwork should be absolutely parallel to your camera sensor — use a level on both. This eliminates glare while giving you even coverage across the surface.
Distance matters more than most people realize. Too close and you get hotspots. Too far and you're fighting ambient light bleed. Six feet is a solid working distance. Measure it once, mark your floor with tape, and stop thinking about it.
Setup 2: The graduated sweep (for sculptures and 3D objects)
One light becomes your key at 45 degrees, positioned slightly higher than the object. The second light goes opposite at lower intensity — around 60% power — as fill. Place the sculpture on seamless paper that curves up behind it. No hard horizon line, no distracting background edges.
The power differential creates dimension without harsh shadows. Flat lighting makes 3D work look dead. That subtle shadow gradient shows form while keeping detail readable everywhere.
Setup 3: The copy stand setup (for works on paper, delicate pieces)
Both lights at 45 degrees but lower — almost at artwork height. Camera directly overhead using your tripod's center column extended down, or a proper copy stand if you have one. This eliminates handling for anything fragile.
One detail worth doing properly: measure your light angles with an actual protractor the first time. Then mark everything — floor position, light height, tripod placement. Photography becomes paint-by-numbers instead of guesswork.
Color management that actually works
Color accuracy is what separates real documentation from iPhone snapshots. Most tutorials overcomplicate this with monitor calibration deep-dives and technical rabbit holes that don't really matter for gallery work.
Shoot RAW, not JPEG. RAW files hold more color data and let you make corrections without destroying image quality. Set your camera's color space to Adobe RGB — it captures a wider range than sRGB. Set it once and leave it.
Start every session by photographing your color checker card under your lights. Just one clean shot. This becomes your reference for the entire batch. In Lightroom or Capture One, use that shot to build a color profile you'll apply to everything from the session. The software literally has a tool where you click the color card, it recognizes the patches, and generates correction values automatically. Thirty seconds. Apply it across the batch.
White balance trips people up constantly. Your LED panels probably claim to be 5600K daylight balanced. They're usually off by 200–300K with a green or magenta tint. The color checker corrects this without guesswork. Stop trying to eyeball it.
Export in sRGB for web, Adobe RGB for print. Yes, you shot in Adobe RGB — but web browsers can't display that full gamut. Export wrong and your carefully managed colors look flat and desaturated online. Build export presets for each use case once and stop thinking about it after that.
File naming that scales beyond 500 pieces
IMG_4827.jpg tells you nothing. Six months later you're searching through thousands of files trying to find one painting for a collector inquiry. Here's a structure that actually holds up:
ArtistLastArtworkTitleYearInventoryNumVersion.jpg
Example: MitchellUntitledBlue2024INV1847v1.jpg
Searchable by artist, artwork, year, or inventory number. The version number handles reshoots or alternate angles. When you're managing 500+ pieces, you can find anything in seconds.
Keep titles short — around 20 characters. "Landscape with Multiple Figures and Atmospheric Perspective" becomes "LandscapeMultipleFig." You're not writing poetry in the filename.
Maintain a spreadsheet that maps inventory numbers to full artwork details. The filename gets you close; the spreadsheet gives you everything else — dimensions, medium, price, location, consignment terms.
``
/Photography
  /2024
    /01January
      /20240115NewAcquisitions
      /20240122SmithConsignment
    /02February
      /20240205_SpringShow
``
The batch import checklist that cuts processing from hours to minutes
The difference between four hours and forty minutes on a photo session comes down to preparation and batch operations. Most galleries shoot everything, dump files onto a computer, then edit each image individually. That's genuinely painful when you're photographing twenty pieces against a catalog deadline.
Before you import anything:
-
Check your color checker shot — If it's blurry or badly exposed, reshoot it now. This one image affects everything else.
-
Delete obvious failures on-camera — Blurry shots, test frames, duplicates. Don't import garbage just to delete it later.
-
Create your import preset — Lens corrections, chromatic aberration removal, base sharpening. These apply automatically to everything during import.
-
Set up your file renaming — Configure the import dialog to rename files according to your naming system. Most software can pull EXIF data, add sequential numbers, and include the shoot date automatically.
During import:
-
Apply your color checker profile to everything
-
Add basic metadata (copyright, gallery name, shoot date)
-
Generate 1
1 previews if your machine can handle it
-
Back up to a second drive simultaneously
After import, use batch synchronization for anything affecting multiple images. Crop one painting to remove wall edges? Select all paintings, sync the crop. Adjust exposure across all sculptures? Sync that too. Touch each image as few times as possible.
| Export Type | Size | Color Space | Format | Quality |
|---|---|---|---|---|
| Web gallery | 1200px long edge | sRGB | JPEG | 80% |
| Print catalog | Full resolution | Adobe RGB | TIFF | Lossless |
| Artist documentation | 2400px | sRGB | JPEG | 90% |
| Insurance records | Full resolution | Adobe RGB | TIFF + metadata | Lossless |
Select your batch, pick the preset, export. What used to take hours of individual exports finishes while you grab coffee.
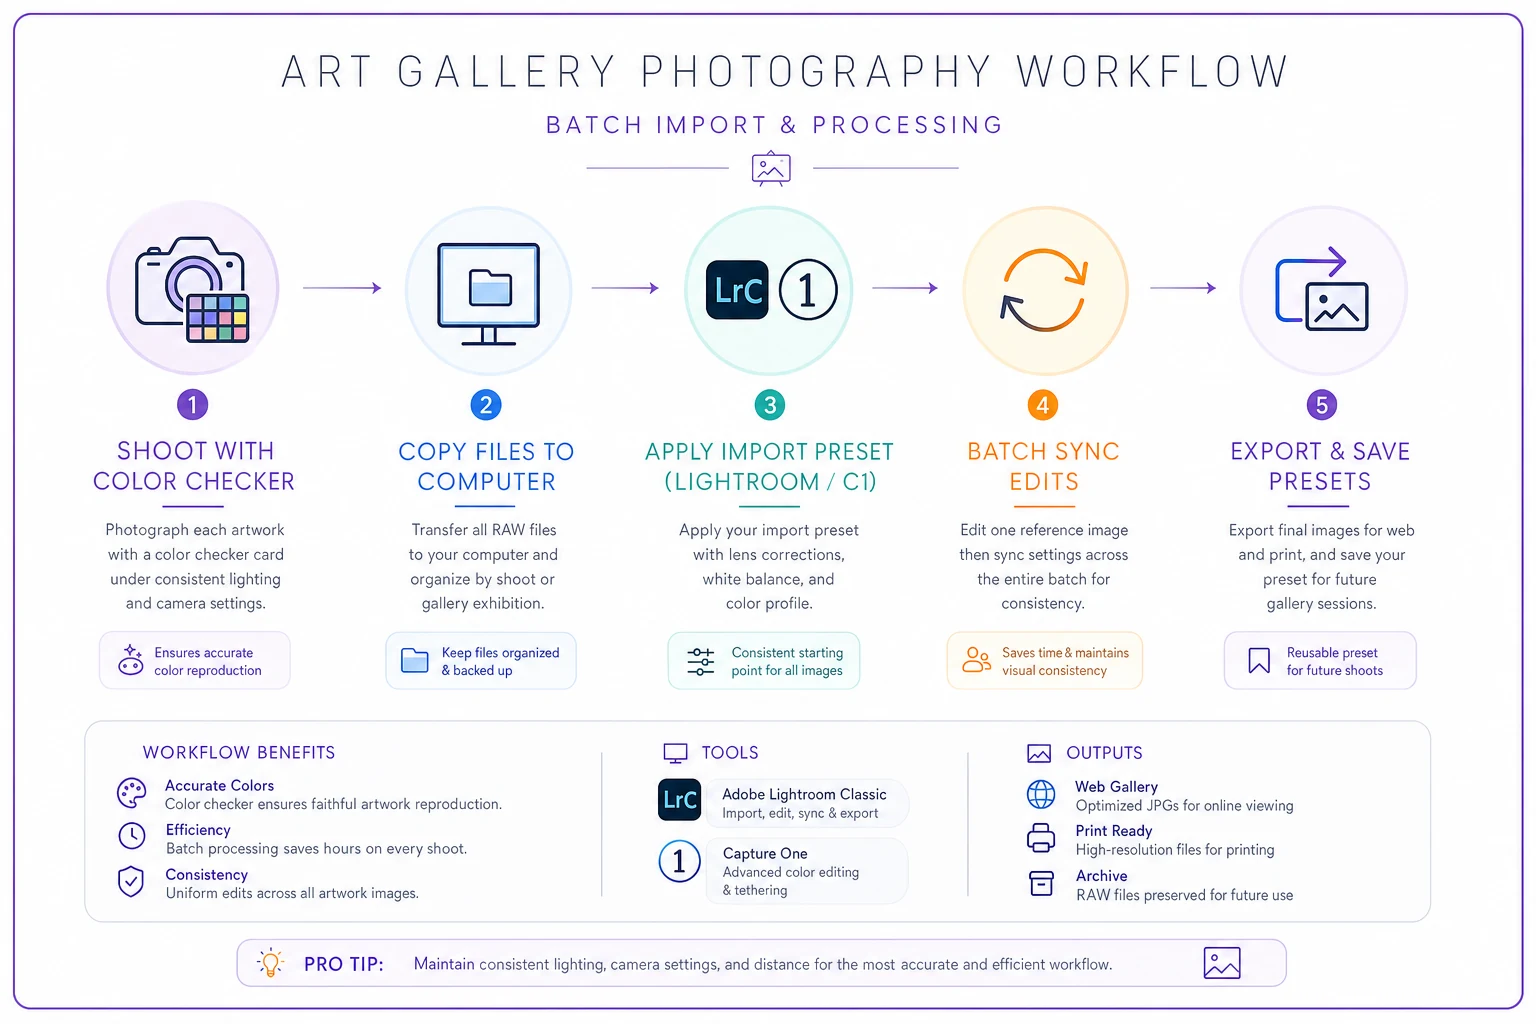
Here's a quick visual of the import-to-export workflow.
Real-world example: 47 pieces in one afternoon
A gallery needed to document 47 pieces for their spring catalog. Previous photographer quote: $8,500 plus two weeks turnaround. They bought the kit described above, spent a day practicing, then did everything themselves.
Setup took 45 minutes — lights positioned, spots marked, color checker calibrated. They organized artworks by size and type: small paintings first, then large, then sculptures. Minimizing setup changes between groups makes a real difference.
Small paintings: 22 pieces in about 90 minutes. Same lighting, same camera position, swap artwork and shoot. Quick filename entry between shots.
Large paintings: 15 pieces in roughly an hour. One lighting adjustment for the size change, otherwise identical.
Sculptures: 10 pieces in 90 minutes. Switched to Setup 2, slightly more time per piece for positioning, but still systematic.
Import and initial processing took about 30 minutes for rough corrections across everything using batch sync. Another hour for individual adjustments on hero pieces going on the catalog cover. Files renamed, organized, backed up automatically during import.
Total time: around 6 hours including setup and breakdown. The images were consistent, colors accurate, everything properly lit. Online sales climbed roughly 30% after updating the site with properly documented work — not because the art changed, but because people could finally see it.
Quick equipment substitutions when budgets are tight
Can't swing $800 right now? Here's what actually matters versus what doesn't.
Skip the new camera first — A phone from the last three years probably outperforms DSLRs from 2010. The limitation is control and lens flexibility, not raw image quality. Start with your phone, upgrade later.
Never skip the color checker — This $90 tool makes more practical difference than a $2,000 camera upgrade. Buy this before anything else.
DIY light panels — Hardware store work lights with daylight LED bulbs cost about $30 each. Not as convenient as proper photo panels but completely functional. Just make sure bulbs match — same brand, same color temperature rating.
Borrowed tripod — Someone you know has a decent tripod gathering dust. Borrow it until you can buy your own. Just don't use a wobbly one — camera shake ruins everything.
Common mistakes that ruin batch processing
The worst mistake is treating each artwork as its own unique photo project. Gallery staff spending twenty minutes perfecting the lighting for one painting, then completely changing the setup for the next — that's how a twenty-piece session turns into a two-day nightmare.
Consistency beats perfection. A slightly imperfect but consistent batch looks professional. A mix of "perfectly" lit individual shots looks chaotic.
Shooting different angles for similar works is another problem. One painting straight-on, the next at a slight angle because "it reduced glare better." Now your catalog pages look inconsistent. Pick your angle, solve the glare with lighting position, and hold the line.
Color temperature drift destroys batches too. LED panels heat up and shift color slightly over a long session. Take another color checker shot every 30–45 minutes and apply the updated profile to subsequent images. It's a small habit that prevents subtle shifts that make you want to reshoot everything.
Export sizing trips up galleries constantly. Beautiful 5,000px-wide images going to the website that take forever to load. Or 600px versions sent to the printer that come back pixelated. Build your export presets once and use them every time. Your condition reporting workflow needs full-resolution archives anyway — might as well get your export sizes right from the beginning.
When to still hire a photographer
This setup handles around 90% of gallery documentation. But some situations still need a professional.
Installations that can't move to your photo area. Site-specific work, murals, anything integrated into architecture. Your controlled lighting setup won't help here. Hire someone with experience lighting large spaces.
Technically challenging materials — highly reflective metals, extreme surface textures, transparent glass sculpture. These need specialized techniques that take real time to learn, and the learning curve isn't worth it for occasional pieces.
Marketing hero shots for major exhibitions or publications. Documentation and marketing photography are different disciplines. You want consistency from documentation, but a cover image for a publication needs something different — more considered, more atmospheric.
Know the difference. Don't hire expensive photographers for routine documentation you can do yourself. But don't try to DIY genuinely complex work that needs real expertise.
Building photography into operational workflows
Galleries that handle artwork photography well treat it as an operational system, not a creative project. They work it into existing processes rather than scheduling it as a separate event.
New inventory arrives? Photography happens during condition checking, before anything moves to storage. The work is already out and being handled carefully. Add five minutes for photos rather than scheduling a whole separate session later.
Rotation between storage and gallery floor? Photograph pieces while they're in transit. The art's already moving through your space — capture it in the documentation area you've set up along the way.
This kind of systematic approach means artwork almost never sits unphotographed. No more rushing to shoot twenty pieces the night before a submission deadline. No more "we'll photograph it later" that quietly never happens.
Operational software managing your inventory can trigger photography tasks automatically. New acquisition logged — system creates a photography task. Artwork returned from loan — task created to document current condition. Work sells and needs detail shots for shipping — task appears with specific shot requirements attached. Those automated triggers make sure things don't fall through the cracks. The condition reporting workflow you've built requires consistent documentation anyway — might as well make that documentation sales-ready from the start.
File storage and backup without enterprise costs
Galleries generate a lot of image data. Twenty pieces at 25MB each — typical RAW file size — means 500MB per session. Shoot weekly and you're looking at roughly 25GB annually just for RAW files. Add exported versions and you'll triple that.
Cloud storage seems like the obvious solution until the monthly bills add up. Google Drive, Dropbox, Adobe Creative Cloud — all charge recurring fees that compound. For a small gallery, $50–100 monthly on photo storage starts to feel like a lot.
A hybrid approach balances cost and security better:
Local storage on two external drives — one primary, one backup. 4TB drives cost around $100 each. That's several years of photography for $200 total with no monthly fees.
Cloud backup for hero images and current inventory only. Keep your active sales inventory — maybe 100–200 pieces — in cloud storage for easy access. Archive everything else locally. This keeps cloud costs under $10 monthly while protecting the images that matter most right now.
Yearly archive to cold storage. Services like Amazon Glacier charge almost nothing for rarely-accessed files. Upload your previous year's RAW files annually. It costs pennies per gigabyte but gives you a real safety net against catastrophic failure.
The biggest mistake is thinking you need everything instantly accessible. You don't. Current inventory needs quick access. Everything else can live in cheaper storage tiers without any real cost to your workflow.
Professional artwork documentation doesn't require a professional photography budget. The kit described here, combined with systematic processes, produces imagery that rivals what galleries pay thousands for. More importantly, it puts control back in your hands.
The galleries doing this well aren't photography experts. They just decided that consistent, accurate documentation was an operational priority rather than an artistic adventure. They built simple systems, marked their floors with tape, created their presets, and now photograph new work in a fraction of the time.
Done right, your artwork photography workflow becomes a genuine competitive advantage. Collectors browse more when images load fast and look consistent. Artists trust galleries that document their work properly. Insurance claims go smoother with solid documentation. Sales improve when people can actually see what they're buying.
Stop treating photography as a special event. Make it as routine as opening the doors in the morning.
Ready to elevate your gallery operations?
Join 500+ galleries using Artioly to streamline operations, boost visitor engagement, and increase art sales.